Sweet-Tart Perfection: Crafting Candied Lemon Slices with Just 3 Ingredients
Imagine an elegant garnish that instantly elevates any dessert, cocktail, or even a simple cup of tea into a gourmet experience. Now imagine that same sophisticated touch is surprisingly easy to achieve right in your own kitchen, requiring only three basic ingredients. We're talking about delightful **candied lemon slices**, a sweet-tart treat that transforms humble lemons into glistening, edible works of art. Forget specialty stores and complicated techniques; this guide will show you how to master these versatile citrus candies with minimal effort and maximum reward. For too long, **candied lemon slices** have been relegated to the realm of professional patisseries and high-end bakeries. But the truth is, this seemingly intricate confection is incredibly approachable for home cooks. You don't need a candy thermometer, obscure tools, or advanced culinary degrees. With just lemons, sugar, and water, you can create a batch of these luminous beauties that are perfect for snacking, decorating, or adding a bright, zesty punch to a myriad of dishes.Why Candied Lemon Slices Are Your New Secret Ingredient
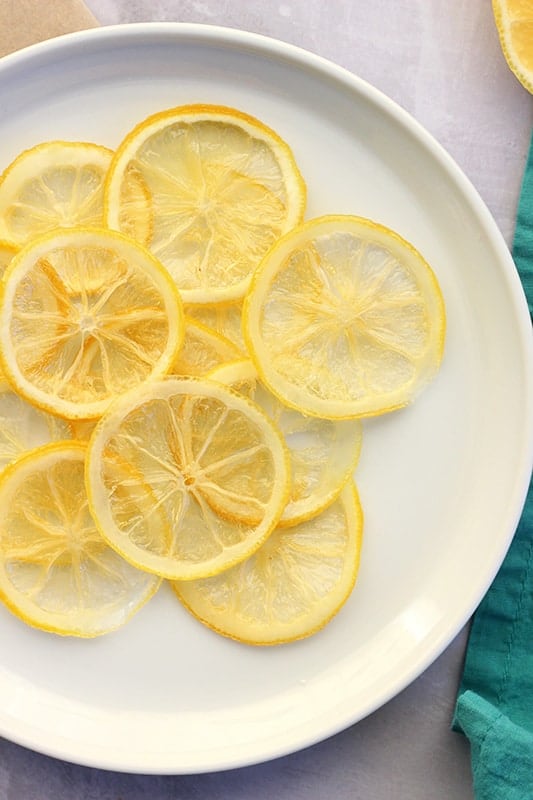
Beyond their stunning visual appeal, **candied lemon slices** offer a unique flavor profile – a perfect balance of intense sweetness and refreshing citrus tang. They bridge the gap between a decorative flourish and a delicious edible component, making them far more valuable than a simple maraschino cherry. Here's why you'll want a batch of these on hand:- Elevate Aesthetics: From classic lemon meringue pies and cheesecakes to delicate elderflower cakes, these translucent golden rounds add an instant touch of sophistication and vibrant color.
- Irresistible Snack: For citrus lovers, a well-candied lemon slice is an addictive treat, offering a burst of sweet and sour flavor that satisfies cravings.
- Cocktail Companion: Drop one into a gin and tonic, a prosecco spritzer, or even a hot toddy for an unexpected layer of flavor and a beautiful presentation.
- Versatile Flavor Enhancer: Beyond desserts, they can be chopped and added to glazes, muffin batters, or even savory dishes like roasted chicken or fish for a delightful zing.
- Thoughtful Gift: Packaged in a pretty jar, a homemade batch of **candied lemon slices** makes a charming and unique gift for friends and family.
If you're eager to unlock the full potential of these citrus gems in various culinary applications, explore our comprehensive resource: Elevate Desserts & Drinks: The Ultimate Guide to Candied Lemon Slices.
The Power of Three: Essential Ingredients for Candied Lemon Slices
As promised, simplicity is key here. You only need three humble ingredients to embark on your **candied lemon slices** journey:- Lemons: The star of our show!
- Choose Wisely: Whenever a recipe calls for using the rind, always opt for organic, unsprayed, or unwaxed lemons. This ensures you're not infusing your delicious candies with unwanted chemicals.
- Preparation: Give your lemons a thorough wash and scrub, even if organic, to remove any surface impurities. Pat them completely dry.
- Slicing Precision: This is crucial for uniform cooking and presentation. Use a very sharp chef’s knife or, ideally, a mandolin slicer to achieve consistent 1/8 to 1/4-inch thick slices. Thinner slices will become more translucent and delicate, while slightly thicker ones retain a bit more chew. Aim for uniformity to ensure even cooking.
- Granulated Sugar: The sweet backbone.
- Why Granulated? Standard white granulated sugar is perfect for this recipe. Its fine crystals dissolve quickly and create a clear simple syrup that allows the vibrant color of the lemon to shine through.
- Avoid Brown Sugar: While delicious in other contexts, brown sugar will unfortunately discolor your **candied lemon slices**, giving them a muddied appearance rather than the desired translucent gleam.
- Water: The solvent and tenderizer.
- Quality Matters: Since water plays a significant role in developing the flavor and texture, using filtered water is recommended for the best taste. If your tap water is excellent, feel free to use it.
Step-by-Step Guide to Sweet-Tart Perfection: Making Candied Lemon Slices
This process involves a few simple stages, each contributing to the final glorious result. Don't be intimidated; each step is straightforward.Step 1: The Blanching Ritual – Softening and De-Bittering
The first crucial step is blanching. This isn't just about softening the lemon rinds; it's also about extracting some of the natural bitterness, resulting in a more pleasant final product.
- In a large saucepan, bring about 4 cups of water to a rolling boil.
- Carefully add your prepared lemon slices to the boiling water. Cook them, uncovered, for 2-3 minutes. You'll notice them start to become slightly pliable.
- Using a slotted spoon, gently remove the lemon slices and immediately plunge them into a bowl of ice water. This "ice bath" quickly stops the cooking process, preserving their color and structure.
- Drain the water from the saucepan. Carefully transfer the blanched lemon slices to a paper towel or clean kitchen towel. Gently pat them completely dry.
- Editor's Tip: Avoid using metal tongs to handle the delicate lemon slices during this stage, as they can easily bruise or tear the softened rinds, affecting their final appearance. A slotted spoon is your best friend here.
Step 2: The Simple Syrup Simmer – Infusion of Sweetness
Now, it's time to transform the blanched lemons into glistening, sweet-tart candies.
- In the same clean saucepan, combine 1 cup of granulated sugar with 1 cup of fresh water.
- Bring this mixture to a boil over medium heat, stirring constantly until the sugar has completely dissolved. This liquid is now known as simple syrup.
- Reduce the heat to a gentle simmer (medium-low). Carefully add the dried lemon slices to the simple syrup, ensuring they are mostly submerged.
- Simmer the lemon slices, uncovered, for 30-35 minutes. The goal is for the rinds to become wonderfully translucent, indicating that the sugar syrup has permeated the cells of the lemon. Keep an eye on the liquid level; if it reduces too much, you can add a tablespoon or two of hot water, but generally, it should be fine.
Step 3: The Drying Game – Achieving Perfect Texture
Patience is a virtue in this final stage, as proper drying is essential for the perfect texture.
- Once the lemon slices are translucent, carefully remove them from the syrup using a slotted spoon. Discard the remaining syrup (or save it for cocktails!).
- Line a large baking sheet (e.g., 15x10x1 inches) with parchment paper. Arrange the **candied lemon slices** in a single layer, ensuring they do not touch or overlap. This allows for even air circulation.
- Let the lemon slices dry at room temperature overnight, or for at least 12-24 hours. The goal is for them to become tacky but not sticky, and firm yet pliable.
- For crispier slices, you can dehydrate them in a dehydrator following the manufacturer’s directions, or in an oven set to its lowest temperature (around 150-200°F / 65-95°C) with the door slightly ajar, for several hours until desired crispness is achieved. Keep a close watch to prevent burning.
Step 4: Optional Sugar Coating – The Sparkling Finish
For an extra touch of sweetness and a beautiful sparkling effect, you can toss the dried slices in additional granulated sugar.
- Once the slices are adequately dried (tacky but not sticky), gently toss them in a bowl with a few tablespoons of fresh granulated sugar until lightly coated.
- Return them to the parchment-lined baking sheet and let them dry for an additional 2-3 days. This extra drying time ensures the sugar coating adheres well and contributes to a firmer, less sticky final product.
For an even more detailed walkthrough and visual aids, check out our guide on Easy Homemade Candied Lemon Slices: No Thermometer Needed!
Storage and Longevity
Once your **candied lemon slices** are perfectly dry (no longer sticky to the touch), store them in an airtight container at room temperature for up to 2-3 weeks. For longer storage, you can keep them in the refrigerator for up to a month, or even freeze them for several months. Just ensure they are completely dry before storing to prevent mold.Unleashing Their Potential: Creative Uses for Candied Lemon Slices
Now that you've mastered making these luminous treats, the possibilities are endless!- Dessert Decorations: Garnish cakes, cupcakes, tarts, and pies. They're especially beautiful on anything lemon-flavored.
- Beverage Enhancers: Add to iced tea, hot tea, cocktails (like a Pimm's Cup or a whiskey sour), or simply a glass of sparkling water.
- Snack Attack: Enjoy them straight from the jar for a delightful sweet-tart sensation.
- Baking Ingredient: Chop them finely and fold into scone dough, muffin batter, or even bread pudding.
- Cheese Boards: Pair with sharp cheeses and crackers for a sophisticated sweet and savory element.
- Gift Giving: Arrange them artfully in a small jar with a ribbon for a thoughtful homemade present.
